Monday, March 29, 2010

DIY SIP planters

SIP what the heck is that? SIP planters i found out are "sub-irrigating planters".They water the best way, and that's from the ground up. They work using capillary action. now i wasn't the greatest when it came to my physics classes, but this is really not that difficult. actually it's pretty darn easy...


from what i gather it goes a bit like this: you have some containers along the bottom that are hollow and allow for water to fill them, then you have a fill tube to fill up the containers, finally you have a soil-less mix that acts like a wick (pulls up the moisture) from the bottom and distributes it to the top. you can see it here


This is one of the DIY planters from the link above (a blog called Inside Urban Green). Its ridiculously simple. it's an alternative to those earthboxes (which i only first heard of today). 


I'm super horrible about remembering to water sometimes or sometimes i'm not home at all. This way i'll know it's taken care of and i'll feel a bit better about myself knowing i reused something i would have otherwise thrown away.


I plan on trying it myself and i'll tell you how it goes. what i'm doing now, top watering with bottom hole pots, seems almost archaic...


The only thing i'm wondering about is once i put a light loamy mix in the bottom to act as a wick, can i fill the rest with regular potting soil? i donno. but you just can't screw up this route. there's no overwatering really and the little drainage hole tells you when you're full of water. You could even put um outside (if the container is weatherproof) and make some pretty wood shell to cover the outside. 


Another neat thing i found, which i'll use next time i take some cuttings to propagate, is using bottles inside bottles. This pic is form another site called pineapplepalace. These guys are from Austin and are doing some interesting experiments to find out things that work. Great for me b/c they live close so i can gauge how my plants should be progressing and learn some of the better ways of doing things through their findings. They're pretty thorough about things too. i wouldn't be surprised if they were involved in a gardening or science profession for a living. The guys from Urban green also employ this method (and about any method using plastic bottles - guy is super dedicated). He gives detailed instructions here via photo flickr sets!!! How nice ^_^
Mothers don't let your children grow up to be top watering plants in clay pots with saucers. They'll learn little about plant science that way. Don't make your kids into drain hole waterers. Their friends will laugh at them.
Too cute.


recycling & healthy plants are a win-win. plus it's super cheap, can't beat that.

Saturday, March 20, 2010

Butterflies and Air Layering

Today is the first day of spring!!! that means nothing to me really, but it's fun to note i suppose. wow what a killjoy  ^_^

Out looking at the veggies and saw the prettiest butterfly hovering around. it was amazing b/c it didn't seem frightened at all of me. i was moving literally a foot or two away from him and he just floated around without a care in the world. i acually left, got my camera, came back and it still didn't seem the least bit phased. it seemed to find the soil very tasty or interesting. whatever that thing they uncurl to suck the yummies out of flowers it was using to inspect the soil. Saw a black and yellow one later on in the front i'll post it later when i'm back at home. I think i found this one so pretty b/c of the color scheme. i love that seafoam green and white against the black. I never thought of orange being a good color combo with the green and black, but the underside looked so pretty.


I bought some pink jasmine and decided that i was going to attempt to propagate it by two different means: softwood cuttings and air layering. in my book it says that you're supposed to use moss inside the bag for the roots to grow in, but since i didn't have any so i just used potting soil... i'm sure the moss is so that there's nothing that can cause disease or pests to the developing roots, but we'll see how it goes... it smells wonderful though so i hope at least one of the methods work. i got a hibiscus to root from cuttings before but the success rate was low. i need to break down and actually buy some perilite i've just been too lazy to go out and do it. if i dont get any rooting from these cuttings i'll do it proper.

random sidenote: my brother is playing modern warfare 2 for the PS3 and god that game is too real and semi disturbing. like the very first mission you go to an airport undercover and take out a ton of innocent civillians. they're all crawling to get away b/c they're wounded and you're supposed to shoot them and take them out. i mean i can deal with some gruesome stuff but to have a controller and even semi act that out... even for semi crappy polygon characters its a bit like wow. you just have to see it. god forbid Fox news got a hold of it. i know they would have a field day with it. like i can see them all outraged and going this game needs to be pulled off shelves now!!! all on an overly rightous campaign. those people scare me. i'm not gonna go all off on that though. another day.

Monday, March 15, 2010

One-trick Tulips

Ok, so all the leaves fell off my tulips i got for valentines so i pull them out of the pot and notice a couple of odd things.


one is that they're rootbound in the pot. i didn't realize the roots grew that extensively.
second, the roots were very fine. i dont know if that's a normal thing for tulips or not. the only other bulb i've planted has been amaryllis and they have dramatically thicker roots.
third, the bulbs - instead of being a single large bulb, they split into several smaller bulbs very similar to a clove of garlic. yeah, garlic. i thought that perhaps i would get one tiny bulb off a very large one but all the bulbs seem a bit on the small side. but then again i'm not accustomed to dealing with bulbs much less tulip bulbs.


very sad thing i read though is that in my zone they are treated as an annual. annual meaning you plant them, they grow, you dig them up, you throw them away. wha? wha? throw them away? as in trash? damnit!
quote i found from a poster on gardenweb:
Okay, first you need to know that tulips in the deep south are planted as Annuals. This means, they will bloom once, and then we dig them up and discard them. (I know. I know. Repeat after me: They're cheap. :) The reason for this is we don't have anywhere near enough winter chill for them to rebuild their strength to bloom again. The PLANTS will come up year after year, but you will get no blooms (or a pitiful little one just here and there). So, you need to prepare yourself for the throw-away.
but they were a present! i'm not prepared for the throw-away! you know what, i'm stubborn and i'm doing it anyway. i'm saving them, planting them and not going to put too much stock into them bloom-wise next season.

i don't know why but i didn't get any seed pods either. that was a bit disappointing. i even tried to help them out and play bee-girl and pollinate them myself. sigh...maybe it's b/c they were some sort of hybrid? i'll buy a bag next year and see if i get pods from those. i know that they're cheap and money is not the point. its the fact that i want to see generations and generations of my parent plant and know that i facilitated the growth of the new little tulip babies. ^_^

More plantings

Lots of sprouts have come up: portulaca, poppy, cherry tomatoes, snapdragon, nicotiana, coreopsis, aster hulk, pretty much everything i planted recently. The only exceptions are the Astilbe and the larger seeds that were planted in the egg container: torch ginger, datura vine, gardenia. They came from a tropical supplier so they may not be in the best condition. we'll see.

dug out another large section to put in the rest of the hollyhock i had left and the few columbine, larkspur and delphinium i had left that survived multiple floodings. There were about 18 in all. decided i'll put the portulaca, snapdragon and nicotiana in three sections in front of them when they get large enough. what i'm gonna do with the coreopsis and the poppy i haven't quite figured out yet...


one of the ranunculus i planted has already flowered and it looks very cute. i'm glad i planted them. the first was pink. there are about  7 more on the way though. i didn't expect to see the eye in them, that was a surprise. all the pictures i've seen of them do not have the eye part visible. still cute tho. i wonder how long the blooms will last. wow, what see-jane-run  sentences... i promise i'm not a kinder-gardener. : )

I've been seeing many little flower buds on my rose bushes but saw my first actual bloom today. I'm not completely in love with the flowers it produces, they are a bit small and frail. they were bushes rescued from a friend's house and were beloved by his mother who passed away, so i'm sure she's very happy that someone is taking care of them now. So i'm a foster parent for the rose bush b/c i plan on giving them back to him so he can have that memory of his mother as soon as he gets a nice place to put them down at. As soon as i get one in full bloom i'll snap a nice picture of it.


Monday, March 8, 2010

Watch out below

I have an arch enemy now: roof eves.

when it rains the water of course runs down the top of the roof and splats on the ground. Well these huge rolling droplets are like tiny little bombs to my plants. somehow i have a knack for placing plantings directly in their target radius. it's irritating. happened with hollyhocks twice: once when they were in little paper pots sitting on my porch and again now that i've transplanted them into the ground. the row closest to the house is just getting pulverized. i'll have to move them this tuesday before it rains again. it's not like my soil is the fastest draining either... more trial and error i suppose. everything is a learning experience. i'll go check the water level again to see how fast the soil is draining. at least i can make a positive out of it and test the drainage rate :)

Sunday, March 7, 2010

Updates (late as always)

Ok, so when i said "tomorrow" in the last post what i really meant was 2 days from now. i can see where there would be confusion though... :)

Tried a little trick i saw posted somewhere that said if you rake your nails across a bar of soap and get soap under them first before you go digging around in the dirt all puppy-style that it's easier to get the dirt out of there.  Well i tried it and either my soap loading technique was horrible (ha) or it really didn't work that well for me. Someone thoughtfully commented that i should soak them and use hydrogen peroxide which i will be sure to try next time i'm out there digging in the yard.

speaking of digging in the yard: i transplanted the hollyhocks into the ground. they are the first transplants i've ever done from seed so i'm (sadly) very excited and hopeful for the little guys. i didn't do a ton of research on it before i dropped them in but i hope they can tolerate semi-slow draining soil that's slightly acidic - which i've read most of natural texas soil is.
so i'm digging out a spot for them so i can amend the soil a bit before they go in and you would not believe the stuff i found in my soil. my father is a mechanic so you find a ton of misc motorcycle parts everywhere but in addition to that theres:
   lego blocks
   wires
   glass shards from god knows what
   spoons
   bearings
   nails and bolts (nuts included!)
   old micro matchbox toys (my brother and i used to play with outside, only an inch long)


i swear i'm laughing as i type this b/c is so ridiculous. if you saw half of the stuff i pulled up... i'm gonna pile it up next time and snap a pic just so people can shake their heads at it. anyway, so digging this hole and i'm hitting something with my shovel. so i'm curious and i bump it a couple times making a "ting" noise. i'm thinking, alright, gotta be glass or a big rock right? but i dont wanna dull my shovel so i decide to poke around with the trowel to fish the little guy out. turns out it's not just a little guy but a water main, you know, the one that brings ALL the water into your house. yeah, so that was fun to find. note to self, right? i had an axe too to cut away thick roots that were labyrinthed under the dirt so i'm glad i wasn't hacking away at it. you can see the pipe in the picture right there. stuck my shoe in there for length perspective.

i put all the leftover soil in a large separate container and added finely shredded wood to it. the soil is so dark already i think it has plenty of nutrients, it just lacked that loamy texture everyone desires. read that the wood sucks up nutrients as it decomposes but i'm not all that worried about it even if it is true. i added a minute amount proportionally so i figure it's a pretty negligable impact if at all.

and speaking of hacking away roots... i dont know what plant was putting them out but my, there were a TON of roots. i have some ferns near there and some bush that puts out these red piped clustered flowers that hummingbirds gather around but i dont know which was doing it. i'll have to look the bush up later. but the roots were a nightmare. just look...these are only from that small section. those are not sticks, no sir, roots. All of them. funny too b/c i needed one more row for all the hollyhocks i had and i hadn't amended the section but as i was pulling up the root systems it was aerating the soil and loosening it for me. it was win-win.


and the soil i have out front is semi-decent too. i found worms and grubs in it. of course i threw out the grubs b/c i believe i saw somewhere they destroy root systems (although you woudn't guess it by what i pulled up). i found about 3 or  4 of the little worms and chunked them in with the hollyhocks and told them they could live there and start a family and all that good stuff. stay as long as you want my little symbiotic buddies.


oh, and i noticed the snow peas were way way overdue for some sort of trellis action. they were clinging to one another trying to make some headway. makes me think of when you're at work and you have those people that "climb to the top" but in a literal sense. one guy trying to make gain off someone else. well i couldn't let my little peas go out like and all i had was chicken wire from a scrapped previous project so we put it along the back wall. the bad thing is that the vines grow towards the source of the light and since the wall casts a slight shadow (which i'll move the bed next season) they grow away from the wall. to solve the problem i used some old bamboo shade we somehow acquired from somewhere, cut the thin sticks apart and weaved them together to make more of a slant towards the chicken wire we attached. i thought it looked kinda cute and much more natural looking than that hideous wire. next season i'll have to move that bed away from the side of that wall, i dont know what i was thinking when i put it there. and i'm thinking the slight shade cast at the far end (not pictured) is the cause of the stunted growth of a couple of the sprouts. learning experience.


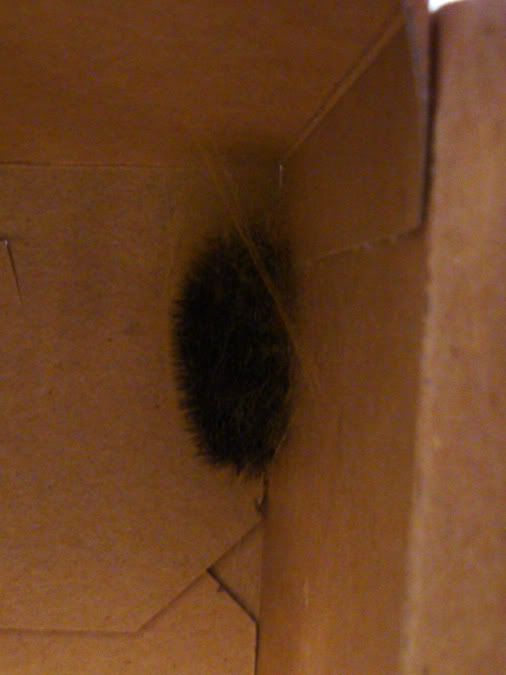
ok, caterpillar time.
i come into my room and notice a hint of movement out of the corner of my eye and had to do a double take before i realized that it was the caterpillar that was moving. keep in mind he's webbed up at the top of the container, so he's actually upside-down. well one of his ends are moving, i don't know which end - what would the head or tail end look like anyway? so the end is protruded out and it looks like two small sacs (either eyes or some set of glands i would assume) are sticking out from either side and from the very tip he (or she :) ) is secreting this yellow tinted fluid in small globuals and sticking them to the webbing. poor thing was contorted at such a weird angle too trying to place the little droplets exactly where he wanted um. i actually sat there and watched him for a good 5 or 10 minutes. i wish i would have caught him doing the webbing. who would have ever thought that caterpillars could do that (especially furry ones). And now that i look at him today he's unclamped all of his footsies and he's just laying there, suspended in his little webbing house (why is everything "little" to me? haha). you can actually see the little globs of fluid all over the webbing in the picture. i would have moved the leaf but i hate disturbing him. i felt bad for even taking off the lid to take a picture. i tried to get a video of him actually secreting and placing the stuff but the top of that plastic container is much too cloudy. if i ever raise another one its strictly glass top only.

the magnolia tree is still a sapling but it's really starting to shine. I'm still pretty pleased about that one. it's the first tree i think i've ever planted and possibly the first thing i ever planted.

sidenote: i HATE the way this editor will not let me wrap text easily around my picutres. they should have a properties section for pictures like MS word when you right click. so irritating.
the plantings around it are ranunculus. they were becoming rootbound and overcrowded in the container they were in so i put them around the tree. not sure how shallow the root system is, but i'm hoping they're not too much interference with the tree. i've seen planting of crocus around trees but they may be better suited for it.

the ranunculus are also putting out flower stems. i can see the little bluges on top that flowers will emerge from on a few of them. i hope they're beautiful when they finally debut.

you can see that poor little top flower that i smacked and knocked petals off of. i took 2 more entire flower heads out too. i forgot how exactly now. it was probably: niki, in the front yard, with the shovel
(get it?).


With the shadier garden side: the hosta roots i planted seem do be doing well but i've seen no sign of the lilly of the valley yet. i'm sure they're fine though. the astilbe roots were planted later so i'm sure i wont see them for a while. the astilbe seeds were planted even later so i doubt i will see anything spectacular from them this year (or maybe even the next). i got super super lazy, not to mention running out of seed starting space, so i just went ahead and direct sowed some burpee alyssum seeds i picked up the other day. i don't find them all that spectacular so if they make it, great. if they don't i won't be that upset. they were a last minute impulse pick-up at the store. they're only 3-6" so i put them right on the front lines of the lilly of the valley so they'll be in front and they're only part shade so they'll get a bit more sun than the rest.

i have to go back to the vegtable garden, forgive me. i love those little guys. they grow so fast they give you instant gratification. it's much easier to wait on the flowers when i can see so much activity from the veggies.

i was very worried about the quality of everything for a while b/c Dad was telling me that they were growing slow, but i think they're alright. i probably planted them a bit later that i could have but hopefully they're not too far off track. i know, i know, they're probably still way too closely packed together - i just can yank out anymore. next year i'll be much more careful about spacing. trial and error. 


i love the way that little tomato sprout picture came out he's too cute. like "here i am world!!!"


one last thing: those poppies i said i planted, i'm so glad i did. on a trip to my brother's new apartment we stopped at a red light and a saw a planting of what i was fairly sure was poppy (or some close relative?) and they looked, well, charming is the best word i can think of right now. i got both the orange/reddish and the yellow variety. i hope mine come out that well. ha, i just yanked the camera out of the glovebox so quick i  even got my passenger mirror in the shot! they look great against the rock too, like a nice contrast.
that's another thing too, i get so jealous when i see seeds that i planted already in maturity somewhere else. i feel like i'm losing so much time to enjoy them. but i feel a little better in the thought that they probably just bought them from some nursery that grew them in a greenhouse and they didn't have the enjoyment of sowing them by their own hand and watching them (nervously as i do) grow. i am gonna winter-sow like a madwoman next time just to get a jump on things. i already looked it up and have a whole list of all the ones that can be started via the winter sowing method and since it doesn't snow (much) in this region i can start them even earlier. i found the list somewhere out there online and i'll have to look it up to give her credit but here are the perennials and the annuals (hardy). i believe her name was Trudi.

i have to start breaking up these very long winded posts but i never get time anymore between everything. i am conscious of it though just so everyone knows :)

oh! i almost forgot. that lab i was finishing... yeah, they weren't done until 2AM that next morning. had to drive up there at  6:30 AM too to drop them off and miss traffic to come home, get ready and leave for work. lack of sleep made for a very interesting day that day. 

Thursday, March 4, 2010

Home for Hollyhocks

I did so much stuff today outside. i have 2 organic labs due by 9 pm today and i waste (well not waste) the whole day doing outside stuff. in my defense it was a very pretty day outside and god knows we haven't seen too many of those lately...

short list of what i did (will follow up with lots of pics tomorrow):
   dug out a section of my yard, and tried to hack through the main water-main to my house (yea!!! haha)
   transplanted hollyhocks
   accidently knocked like 3 flowers off the magnolia tree (do'h)
   built bamboo trellis
   made some nice soil for the rest of the transplants (oh so loamy and rich looking)
   caught the caterpillar doing some odd behavior
   delayed doing my labs :(

if anyone wants to do my gas chromatograpy lab and my eugenol extraction for me you're more than welcome! ...no takers? crap. i promise more pictures than anyone can or would want to handle tomorrow.

Tuesday, March 2, 2010

New plantings for Spring

Ok, finally got around to planting some more things

Poppy (both red and orange)
Snapdragon (assorted colors)
portulaca (double mixed colors)

and some sweet 100 tomato seeds - i'm super late on planting those!

Houston garden centers was giving away free 25 dollar gift cards (i just looked today and they've stopped unfortunately) so i used 2 i had to get some soil to finish up the vegtable garden and do some transplants. I put in the broccoli (12 or so) that had become rootbound in the bottom of the little containers - i knew i had waited way way too long on those guys. And i transplanted some of the tomato bushes that had sprouted (8). I'm out of room in the vegetable garden i set up and i dont know what i'm gonna do about the sweet tomato seeds i just planted... i have some time tho.


Also, my magnolia soulangeana is doing great. I was scared it was a gonner after going threw Ike and all the crappy weather we've been having. After a trip to the garden center my tree looks like it's doing much better than the ones there even! Its still a sapling tho...


On the caterpiller front, the little guy crawled up to the top of the container and webbed himself up there (along with a leaf). I dont know how in the world he got himself up there and when i showed Dad he couldn't believe it. He was trying to say that there was no why he could have got up there all by himself and that a spider yanked him up there. I think he was serious but yeah... that would have to be a huge ass spider... that little caterpillar is a little fatty :)

I'm pretty sure this is normal b/c someone else's did the same thing